
Commercial Single-Ply (PVC - TPO) Roofing: Versatile & High-Performance Solutions
Durable, Lightweight Membranes for Flat and Low-Slope Commercial Properties.
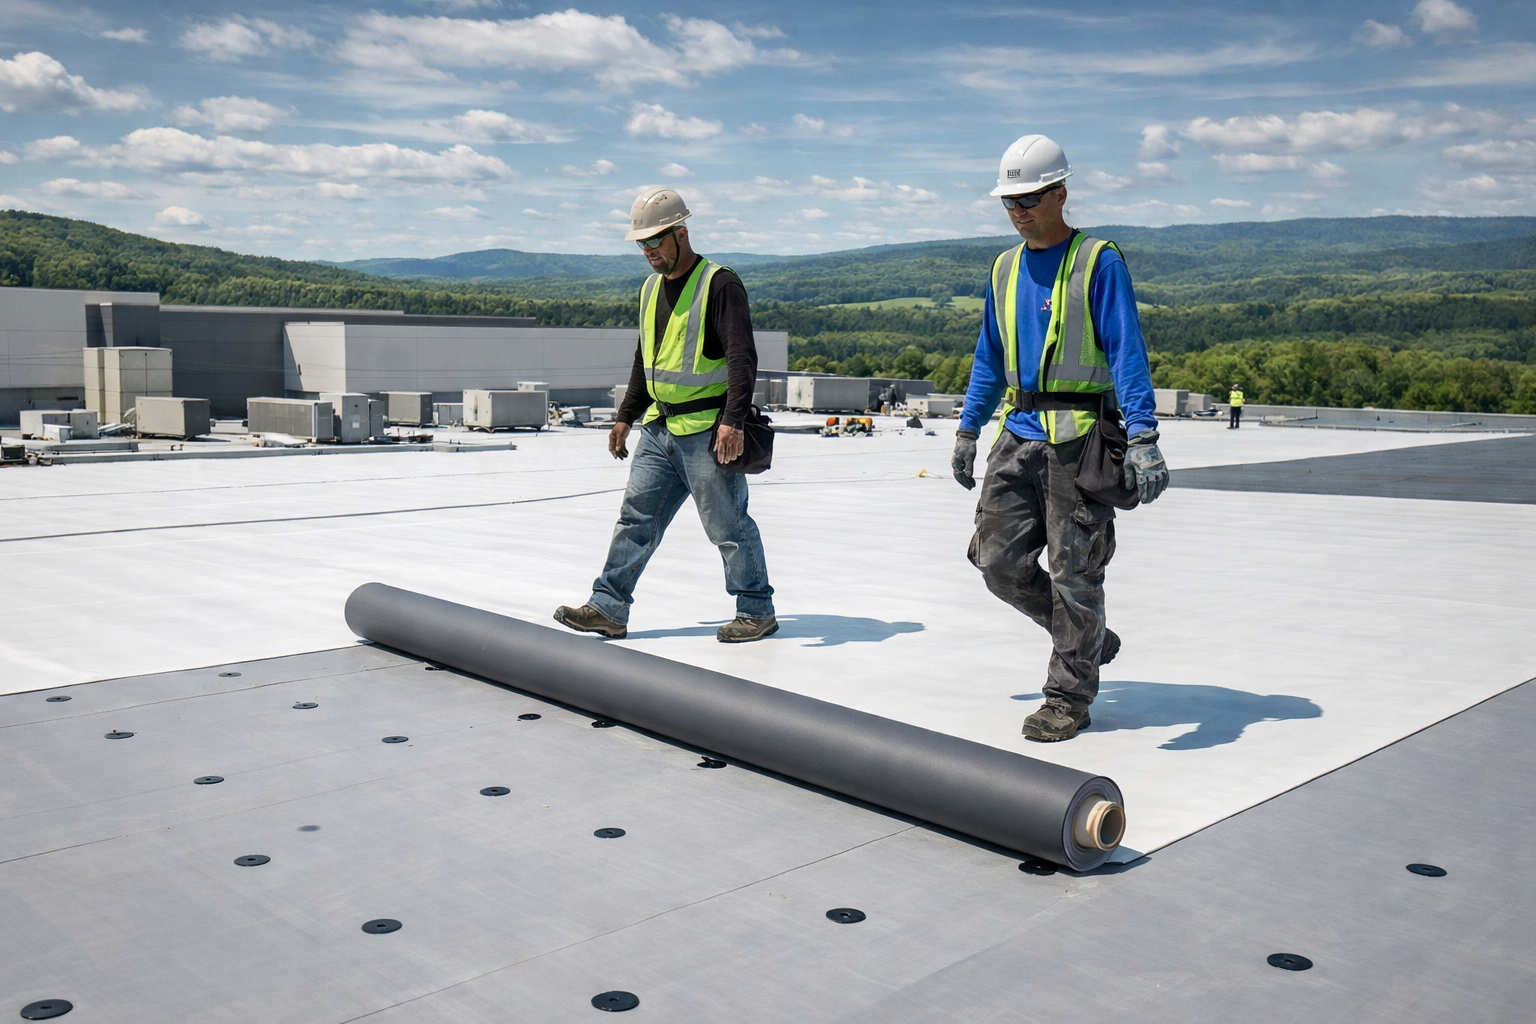
For flat and low-slope commercial properties, single-ply (PVC - TPO) roofing systems are a top choice, and Stormy Ridge Commercial Roofing specializes in their expert installation. We primarily work with advanced membrane PVC systems, known for their exceptional durability, flexibility, and waterproofing capabilities. These versatile roofing solutions provide a lightweight yet robust barrier, designed to withstand harsh weather conditions and significantly extend your roof's lifespan.
The main advantages of single-ply roofing include their remarkable resistance to UV radiation, extreme temperatures, and chemical exposure, making them a highly reliable choice for a wide array of commercial, educational, industrial, and retail buildings. Our expertise ensures a precise, efficient installation that delivers superior waterproofing and long-term performance. With extended non-prorated warranties, our single-ply solutions offer unparalleled protection and value for your business investment.
01
Exceptional Durability
Highly resistant to punctures, tears, and environmental stressors, ensuring long-term performance.
02
Superior Waterproofing
Creates a robust, seamless membrane that effectively protects against leaks.
03
UV and Chemical Resistance
Maintains integrity even under prolonged sun exposure and chemical contact.
04
Lightweight
Adds minimal load to the building structure, suitable for various commercial constructions.
05
Energy Efficient
Many single-ply options offer high reflectivity, contributing to reduced cooling costs.
06
Rapid Installation
Large sheets and simplified attachment methods can lead to faster project completion.
07
Versatile Application
Ideal for new construction and re-roofing projects on flat and low-slope roofs.
08
Comprehensive Warranties
Benefit from robust, non-prorated warranties typically up to 25 years for commercial applications, often covering material, labor, and even "Total Systems" with no dollar limit on repairs, backed by substantial insurance policies.
Step 1: Roof Deck Preparation
The first and most critical step is to prepare the existing roof deck. The surface must be clean, dry, and structurally sound.
✓ Remove Old Materials: The existing roofing system is carefully removed down to the structural deck.
✓ Inspect the Deck: The underlying roof deck is thoroughly inspected for any signs of damage, rot, or water infiltration. Any compromised sections are repaired or replaced to ensure a solid foundation.
✓ Clean the Surface: The deck is swept and cleaned to remove all dust, debris, fasteners, and loose materials that could puncture or compromise the new membrane.
Step 2: Install the Insulation
A layer of insulation is installed over the prepared deck to provide a flat, stable surface for the membrane and to improve the building’s thermal performance.
✓ Lay the Boards: Rigid insulation boards (such as polyisocyanurate or EPS) are laid in a staggered pattern over the deck.
✓ Secure the Insulation: The insulation boards are mechanically fastened to the deck with specialized fasteners and plates. This secures the insulation and prevents it from shifting.
Step 3: Install the Cover Board (Optional but Recommended)
A cover board (typically a high-density, fire-resistant material like gypsum) is often installed over the insulation.
✓ Add a Layer of Protection: The cover board provides an additional layer of protection for the insulation from punctures and adds to the system's fire resistance.
✓ Create a Smooth Surface: It creates a smooth, clean surface, which is ideal for the adhesion of the membrane.
Step 4: Install the Single-Ply Membrane
This is the main phase where the single-ply membrane is laid down and secured. The membrane is typically a large roll of PVC, TPO, or EPDM.
✓ Position the Membrane: The large rolls of membrane are unrolled and carefully positioned on the roof, allowing them to relax and flatten out.
✓ Secure the Membrane: The membrane can be secured using one of three methods:
- Mechanically Attached: The membrane is fastened to the roof deck using specialized screws and plates along the seam. This is a common method for new construction.
- Fully Adhered: The membrane is glued directly to the cover board or insulation using a special adhesive. This method provides a smooth, clean aesthetic and superior wind resistance.
- Ballasted: The membrane is loosely laid and held in place by a layer of river-washed stones or pavers. This method is used when the building can support the extra weight.
Step 5: Seam Welding
This is the most critical step for waterproofing the roof.
✓ Weld the Seams: Adjacent membrane rolls are overlapped, and the seams are welded together using a specialized heat-welding tool. This melts the top and bottom membrane layers together, creating a seamless, watertight bond that is stronger than the membrane itself.
✓ Inspect the Welds: Every single weld is meticulously tested by the installer to ensure a continuous, strong seal, leaving no room for water to penetrate.
Step 6: Flashing and Detailing
This step ensures all vulnerable areas of the roof are properly waterproofed.
✓ Flash the Penetrations: The installer carefully cuts and welds membrane sections around all roof penetrations, such as pipes, vents, and HVAC units, creating a watertight seal.
✓ Secure the Edges: The membrane is secured and sealed at all roof perimeters and parapet walls. This involves installing termination bars and adding extra flashing to prevent water from entering at the edges.
Step 7: Final Inspection and Cleanup
The job is not complete until a final walkthrough is performed to ensure everything is perfect.
Final Inspection: The installer performs a comprehensive inspection of the entire roof, checking every seam, weld, and detail. The roof is then checked by a third-party inspector to confirm the quality of the installation.
Site Cleanup: All debris, waste materials, and tools are removed from the roof and the surrounding area, leaving the site clean and ready for use.